
Why GoPro is the Best Choice for FPV Pilots?
Flying an FPV drone is an exciting experience from the pilot’s perspective. You’ll get a bird’s-eye perspective and feel like a superhero soaring because of this unique perspective. It could be difficult to get all of those thrilling first-person view photos without having to disrupt your journey. To assist you get the most out of your drone GoPro when filming your FPV flights, I’ll walk you through GoPro camera selection tutorials and settings in this article.

Designed to Be Used in Extreme Conditions
GoPro for a drone is the perfect camera for capturing any form of action sport or activity because it was designed from the ground up to be used in difficult situations. Its resilience to shock, water, and cold makes it an ideal partner for first-person-view (FPV) pilots. It is also very easy to transfer to any area because it weighs very little and takes up minimal room. The best part is that the cost of obtaining any of these fantastic upgrades is not prohibitive.
The Clarity of a drone GoProis Unparalleled
Before making a purchase, confirm that the drone with camera GoPro you select can produce high-quality images and fluid videos. The sharpness and richness of images and videos captured with a GoPro drone are well known, particularly when captured in low light. A high-resolution photo is the best place to start, although if needed, “night mode” could be useful. You can always improve the image’s appearance as long as you have access to photo editing tools. Keep in mind that the GoPro models were designed mostly for still shooting. For this reason, drone GoPro is not the best choice if you want to capture video at a high definition level. However, if still photography is your first priority and you’re willing to put up with a slight drop in video quality, then go ahead and get a GoPro for FPV drones.
GoPro is a Convenient and Compact Camera
From the pilot’s perspective, you will need to steer clear of obstructions, keep your balance, and change directions fast as you pilot your drone through the air. This task could become much more difficult if you use a large go pro with drone. GoPros are a great camera option for FPV flights because of their small size and portability. It’s lightweight enough to fit in your pocket and manageable enough to operate while flying with just one hand. Additionally, its small size makes it the perfect travel companion. Important: If you plan to use a GoPro for first-person view flying with your drone or quadcopter, you will need to buy a specific “GoPro mount.”
Fully Functional for FPV
FPV pilots find GoPro for drones to be a helpful tool due to its built-in video capture capability. The GoPro has its own external recorder, but most cameras need an additional one. You may therefore record and share video while in the air with ease. In addition, GoPro is a great choice for FPV flying thanks to its built-in features like Time Lapse, Auto Low Light, and “SuperPhoto.” For example, you may create time-lapse images and videos with Time Lapse that appear to have been taken by a professional.
Consideration Factors When You Choosing the Best Gopro for Your FPV Drone
Image Quality
When choosing the best GoPro for FPV drone, image quality is crucial because it directly affects the quality of your FPV footage. Even under difficult lighting situations, high-quality drone GoPro should be able to take clear, high-resolution photographs with rich colors and optimum exposure. A camera that supports flat color profiles and sophisticated features like 10-bit color would be ideal for cinematographers who wish to color grade their film.
Although having 4K resolution helps protect your investment, casual travelers don’t necessarily need it. The resolution you choose for editing and uploading your work should be the deciding factor in your choice. Today, a lot of low-cost cameras can record in 2.7K or even 4K, offering a great compromise between price and quality. Possibly just as important in determining visual quality as resolution is bitrate. More detail in the image is a result of a greater bitrate.
Image Stabilization Features
When selecting an drone GoPro, image stabilization is a crucial element to consider in order to get the finest FPV drone footage. Smoother, more professional-looking films can be produced by using Electronic Image Stabilization (EIS) or Optical Image Stabilization (OIS), which can assist lessen shaking and vibrations in your footage. A horizon leveling feature, which is available on some action cameras, might be very useful when using FPV drones to capture footage.
Frame Rate
Smoother video is produced with a greater frame rate, especially when social media platforms support such videos. The best GoPro for recording brisk drone flight are those that can film at 60 frames per second or greater. Additionally, for uploads with a greater frame rate, services like Youtube tend to keep a larger bitrate, which minimizes compression.
Slow-motion effects, which can improve your videos by exposing minute details and capturing beautiful drone flight moments, are also made possible by higher frame rates. For instance, filming at 120 frames per second allows you to preserve fluid animation even while playing back footage at 30 frames per second.
Simply put, drone GoPro cameras having a wide range of frame rates are more adaptable when it comes to recording different kinds of footage. Depending on your creative concept, you can change the frame rate for different pictures.
Size and Weight
When selecting a GoPro for FPV drones, weight and size are very important because they have a direct impact on the drone’s aerodynamics, performance, flight duration, and maneuverability. Drones with camera gopro can fly longer, more gracefully, and with less disturbance to its balance and efficiency when the GoPro is small and light.
The camera’s physical factor also affects how simple it is to place on the drone. It’s critical that your drone and its mounting system work together. Make sure the FPV drone GoPro you select can be safely mounted to your drone or that compatible 3D printed mounts are available, as some cameras may require special mounts or adapters. The go pro with drone needs to be snugly fitted into the frame.
Battery Life
Because battery life has an impact on both the duration of recording sessions and the overall user experience, it is a crucial factor to take into account when selecting an GoPro for FPV drones. An extended battery life enables you to record more uninterrupted video.
Internal battery-operated cameras provide a self-sufficient power supply, obviating the necessity for extra wires and connections to the drone. Although it adds weight to the drone and necessitates frequent recharging, this might make the configuration more user-friendly for beginners. Moreover, there’s a chance that the battery would run out in midair, which could mean that recordings are lost.
Conversely, cameras that lack internal batteries depend on the drone’s power supply, which lowers the total weight but necessitates additional wiring. To prevent damage in this situation, it is imperative to make sure the camera is receiving the proper voltage. These factors are equally important in choosing a camera for FPV drone, to learn more about selection factors, check out the article Best FPV Drone Camera:Top 8 Factors.
Best GoPro Recommendations
GoPro Hero 11

The newest and best action camera available is the GoPro Hero 11 Black, which has a number of cutting-edge capabilities that make it perfect for FPV drone pilots.
Because of its almost square 8:7 aspect ratio sensor, which enables adjustable cropping without requiring the camera to be physically rotated, it is perfect for social media platforms like Instagram, Youtube, and TikTok. The Hero 11 Black delivers great image quality and versatility with its ability to shoot in 5.3K at 60fps and 2.7K at 240fps. Excellent editing versatility is also provided by the camera’s 10-bit color, HyperSmooth 5.0 stabilization, HyperView mode (which has the greatest field of view of any GoPro uav drone), and slow motion up to 8x.
The Hero 11 Black offers easy and pro modes for consumers of all ability levels and is compatible with prior GoPro accessories including ND filters. And it has one of, if not the best, image quality among tiny action cameras.
GoPro Hero 12

The GoPro Hero 12 expands upon the Hero 11’s core features by adding sophisticated recording capabilities, such as 4K and 5.3K at 60 frames per second, as well as an adaptable 8:7 aspect ratio for a variety of cropping possibilities. Its professional touch is enhanced by the horizon locking feature, and its Hypersmooth V5 stabilization guarantees motion-free film. The camera’s hydrophobic lens and longer battery life make it even more user-friendly. Backwards-compatible with prior GoPro accessories, it offers features including 10-bit video for flexible post-production. It is the best GoPro for FPV drones.
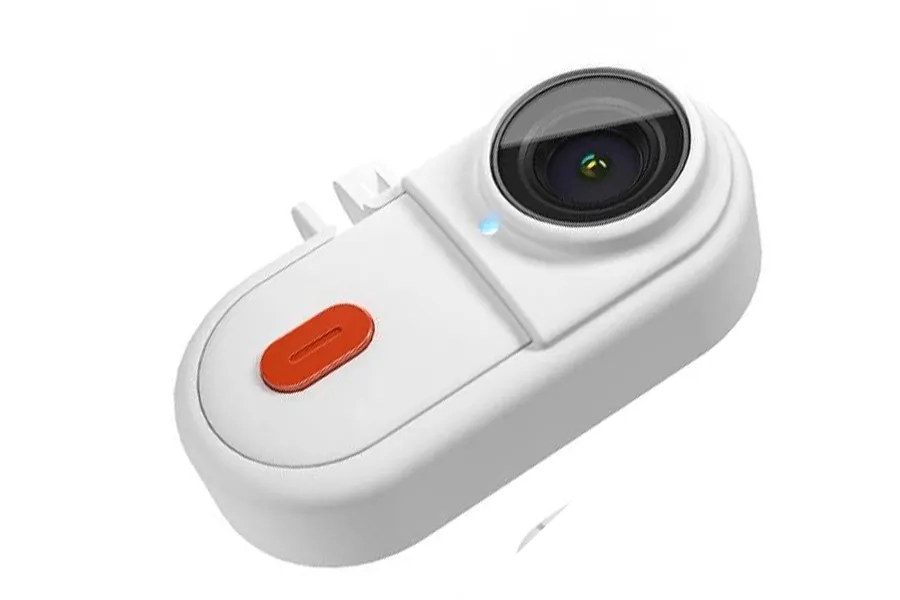
Insta360 GO 3

In the field of action cameras, the Insta360 Go 3 is a definite game-changer. This ground-breaking tool is incredibly lightweight at just 35g (1.2oz), so you can carry it with you at all times, wherever you go.
The Insta360 Go 3 produces 2.7K video in outstanding clarity despite its compact size, ensuring hassle-free fpv shots that will fascinate your audience. This exceptional camera ensures steady photos even in the face of shocks, bumps, or rolls thanks to its gimbal-like stabilization and 360-degree horizon leveling, making it the ideal FPV drone GoPro.
The Insta360 Go 3 is also perfect for making social media videos that will surprise your fans because it supports a 9:16 aspect ratio. The camera also has a long-lasting battery that allows it to record up to 45 minutes of video on its own. You can now record your most exciting fpv excursions with unmatched convenience and quality thanks to the Insta360 Go 3.
DJI Osmo Action 4

Since the DJI Osmo Action 4 shares an exterior design with its predecessor, Action 3 batteries and accessories work with it. It does, however, feature a number of noteworthy internal upgrades, including a better 1/1.3 inch sensor (also found in the DJI Air 3 drone), dynamic range, increased low-light performance, 10-bit color, 4K 120FPS footage, and the Rocksteady stabilizing technology.
Its touchscreen front display makes it more convenient for vloggers to use. It is waterproof up to 16 meters and it features a superb built-in microphone. It can record for up to 160 minutes on a single charge.
In contrast, the DJI Osmo Action 4 offers stability and remarkable performance while the GoPro Hero 11 offers higher image quality and functionality, making it a top pick for both FPV aficionados and vloggers. Although current Osmo Action 3 owners might not think there have been enough improvements to warrant an upgrade, potential new customers could.
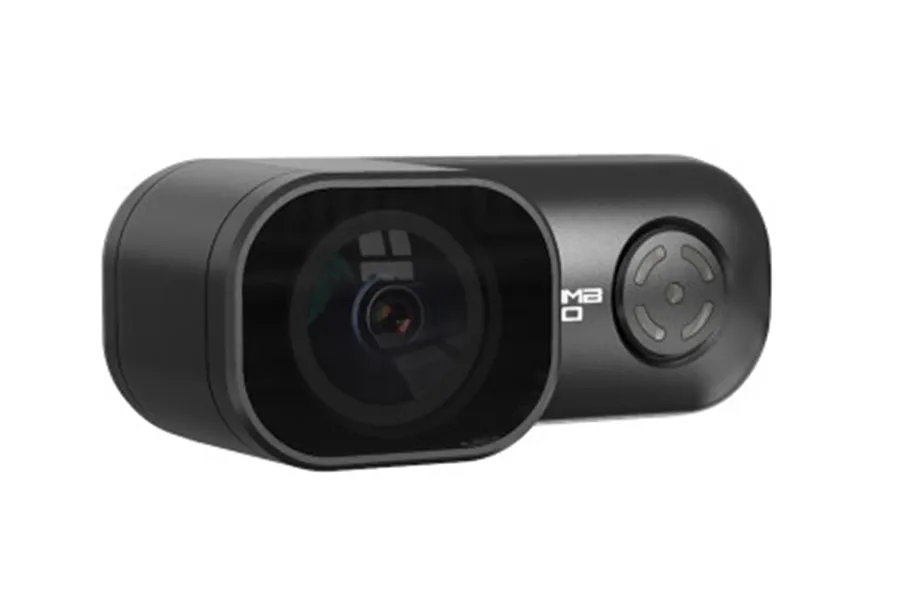
Caddx Peanut FPV Action Camera
No more hacks and altered settings to make it seem FPV-ready! The Caddx Peanut is the smallest and lightest camera available, weighing just 27 grams. It was created with drone pilots in mind. Small enough to be carried without hindering movement.
This GoPro for a drone can capture video at up to 2.5K quality at 50FPS while still offering seamless stabilization, giving you the stunning HD footage you need to make your own elaborate or simple racing videos.
The Caddx Peanut is a very useful action camera, but the company didn’t stop there; they also included some extra tools in case you wanted to utilize the camera on the ground.
RunCam Thumb Pro 4k
Anyone wishing to record stunning 4K footage at 30fps should choose RunCam Thumb Pro. This camera’s ultra-lightweight design and compact size make it the perfect choice for smaller devices like cinewhoops. Not to mention that you can carry it wherever you go because to its 16g weight!
You may get flawlessly stabilized footage taken both horizontally and vertically with the RunCam Thumb Pro. It features the built-in gyro GyroFlow, which offers jerk-free video. Additionally, the wide-angle lens allows for greater action capture. It is an suitable GoPro for drones. If you want to see more FPV camera recommendations, check out the article Best FPV Drone Camera:Top 8 Factors to pick the best camera for your FPV drone.
Best GoPro Settings
ReelSteady and Freestyle
The clarity and general quality of an image are significantly affected by stabilizing footage. In order to preserve resolution on the larger Cinelifter systems, I attempt to apply as little stabilization as possible. More than 30% of the original image is frequently lost when using GoPro stabilization software like ReelSteady! When delivering content via Facebook, YouTube, or Instagram, it might be challenging to determine how much the quality has suffered.
The ideal shutter angle is 180 degrees, or twice your frame rate. At 25 frames per second, this translates to a 50th of a second; at 50 frames per second, it translates to a 100th of a second, and so on. As a result, the image has a realistic and natural level of motion blur. This look may be described as cinematic. The majority of freestyle pilots avoid stabilization and only use a 180-degree shutter. Even at ISO 100, there will be too much light on a sunny day for these slower shutter rates to produce an acceptable exposure. ND filters are used to solve this problem. On bright days, I usually use an ND8 or ND16 to obtain the right exposure.
The usage of a 180 degree shutter can introduce artifacts into the stabilized image if you are flying aggressively and employing a lot of off-camera stabilization, such as using ReelSteady. Many mistakenly believe that this is the drone vibrating, but in reality, it is the effect of stabilizing a blurry high-speed moving frame to make it appear still. Because of this, it’s a good idea to use ReelSteady with a 90-degree shutter. This corresponds to a shutter of 100 at 25 frames per second or 200 at 50 frames per second. In certain situations, you can return to a 180-degree shutter as you become accustomed to controlling the drone more delicately and smoothly because the stabilization will be operating with less effort.
These are my settings for most situations:
- 2.7k 4:3 50fps or 4k 4:3 25fps
- Wide
- In camera stabilisation: Off – this means I can use the unstabilised footage, de-fish and crop the top and bottom to make the image 16:9 or use ReelSteady to stabilise it
- Low light – off
- Shutter – discussed above
- EV Comp – no effect as GoPro is always exposed manually
- White Balance – 5500k outdoors, sometimes auto for indoors
- ISO Min & Max – always set to the same and as low as possible to prevent the camera laddering the exposure.
- Sharpness – Low, If working with an ISO > 100 then it’s much better to avoid in camera sharpening. With RSG, sharpening in post after the crop and interpolation has happened will produce a better result. Having said that I often shoot medium because sharpening in post is demanding even with a really good computer, this is for convenience though not IQ
- Flat Colour – On
- High Bitrate – Yes
FPS
The frame rate, or frames per second, has a big impact on how your video looks and feels. While some pilots may prefer 30FPS, many prefer 60FPS for smoother playback on social media sites like YouTube and Instagram. While 24 frames per second is a common format for movies, the fast drone motions may make FPV footage appear less appealing. Higher FPS options, such as 120FPS or 240FPS, should be taken into consideration for slow-motion filming; this may mean decreasing the quality on older cameras.
Sharpness
Drone GoPro cameras’ maximum sharpness setting might be very dramatic and unpleasant. You can attain the required level of sharpness by setting it to low or medium and then adjusting it in post-production with a video editor.
Frame Rate and Resolution
The final appearance of your drone film can be greatly impacted by choosing the appropriate frame rate and resolution for your FPV drone GoPro. Higher resolutions—like 4K—allow for more precise cropping or downsampling of the image to improve image quality. More frame rates—such as 60 or 120 frames per second—make slow-motion playback fluid. When deciding on the ideal frame rate and resolution for your project, take into account your intended audience, preferred final appearance, and distribution channel.
FOV
The overall viewpoint and visual impact of your footage might be affected by the field of view (FOV) of your action camera. The majority of action cameras have three different FOV settings: broad, medium, and narrow. While narrow FOV offers a closer, more concentrated perspective of your subject, wide FOV offers an immersive, panoramic picture that captures more of the surrounding surroundings. Select the right FOV based on the kind of images you wish to take. Remember that some FOV settings can cause distortion or fisheye effects; if needed, these can be fixed in post-processing.
Filters
Filters can regulate exposure, reduce glare, and enhance colors to greatly improve the quality of your action camera film. When it comes to drone filmmaking, Neutral Density (ND) filters come in handy since they assist keep the shutter speed at the perfect level in strong light and produce a more theatrical effect through motion blur. Additionally helpful are polarizing filters, which boost color saturation while decreasing glare and reflections. Try out various filter types to see which combination works best for your intended look and shooting conditions.
How to Use Your GoPro for FPV Drones
The instructions for connecting the drone GoPro to your FPV transmitter are listed below.
You’ll require:
- A GoPro lens
- An FPV transmitter (comprising of a power wire and antenna)
- An FPV transmitter that runs on a battery
- Avideo cable used to transfer the GoPro’s video signal to the transmitter.
- Adisplay or goggles, as well as a receiver.
First, configure the transmitter. Place the antenna into the transmitter’s port (you must do this before the video transmitter is powered on!). Next, insert the GoPro video wire and the power cord.
Pick up your GoPro for drones and insert the other end of the video cable into the video port located by the SD card on the drone GoPro.
Connect the GoPro, antenna, and video transmitter. Then, insert the power cable’s other end into the battery. This will turn on the GoPro (which will appear to be charging) and turn on the FPV transmitter (an LED will light up on the board).
The GoPro drone and your goggles or LCD monitor must then be turned on in order for the camera to send a signal. You ought to be able to see what the GoPro sees as soon as the goggles or monitor are connected to the FPV transmitter.
All that’s left to do is connect the FPV transmitter and go pro with drone. Naturally, you can carry out these procedures using the FPV transmitter that is already mounted on your quadcopter.
Using a GoPro Dummy
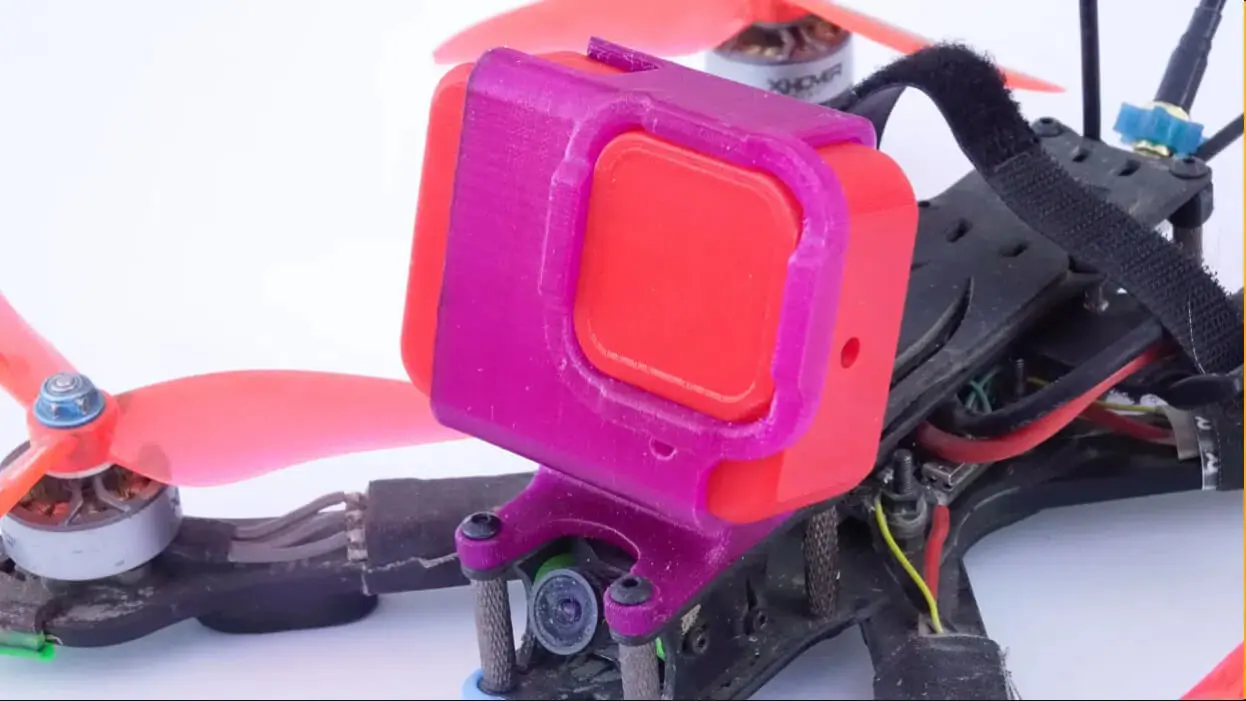
It’s possible that you’re not recording every flight when you’re honing your drone. You can prevent harm to your real GoPro on non-recording flights by using a GoPro dummy.
To match the weight of your GoPro, 3D print a GoPro dummy out of TPU and load it with rice, metal weights, or coins. This guarantees even weight distribution, which impacts the handling and performance of your drone.
You can train consistently without running the danger of breaking your real camera in collisions by using a GoPro dummy. Consider utilizing “wheel balance weights,” which come in 5g and 10g portions, to weigh your dummy. As an alternative, you can fill the dummy with weights like coins, chains, grains, or other materials.
What to Do If GoPro Battery Not Fully Charging?
Your GoPro battery may have a charger problem if it stops charging at 80%–90% (or even 70–80%). Try utilizing a less potent, non-Power Delivery or Quick Charge compliant charger, like one with a 5V 2A output, if you’re using a powerful third-party charger (like an Apple charger or one with Power Delivery capabilities) and the battery never reaches 100%. An alternative that ought to function just as well is using the USB port on your computer to charge the battery in your GoPro.
Tips and Tricks for Using GoPro on FPV Drones
Here are some pointers and strategies to help you record the best GoPro footage on an FPV drone:
- Before attaching the GoProdrone camera, practice piloting the drone.
- For added storage capacity, use a microSD card with a high capacity.
- To keep the drone steady while flying, use the altitude hold mode or the drone’s GPS.
- Maintain a clean GoProlens to prevent hazy video.
- Adapt the drone GoProsettings to the available lighting.