
FPV (First Person View) flying has become a thrilling and popular hobby for drone enthusiasts. It allows pilots to experience the excitement of soaring through the skies from the perspective of their quadcopters. To enhance this exhilarating experience, drone enthusiasts are constantly seeking ways to upgrade their equipment. One popular upgrade is replacing the FPV stack, which includes the flight controller and electronic speed controller (ESC). In this article, we will explore the process of replacing a Diatone Mamba FPV stack with a Neutron RC FPV stack, highlighting the benefits and considerations for a seamless and improved flying experience.
Why is it important to choose the right flight controller stack?
The role of flight controller in drone
- The brain of the drone
- Interprets pilot input from the transmitter and sends signals to the ESCs.
- Controls the motors, flight modes, and various other functions.
- Offers features like GPS, return to home, OSD (On-Screen Display), and blackbox recording.
The role of Electronic Speed Controller (ESC)
- Controls the speed and direction of each motor.
- Receives signals from the FC and translates them into electrical currents for the motors.
- Supports different protocols like BLHeli_S and DShot for improved efficiency and responsiveness.
Benefits of using a pre-built FC/ESC stack
- Compactness and weight savings: Saves space and weight compared to individually mounted units.
- Ease of installation: Simplifies the build process, especially for beginners.
- Pre-configured compatibility: Ensures components are compatible with each other.
- Improved performance: Optimized communication between the FC and ESCs can lead to better flight performance.
Understanding FPV Stack
Before delving into the upgrade process, let’s understand what an FPV stack is and why it is crucial to the performance of a drone. An FPV stack is a combination of electronic components that serve as the brain and power center of a quadcopter. It typically consists of a flight controller, ESC, and sometimes a video transmitter (VTX) and receiver (RX). These components work in tandem to control the drone’s flight, receive video feeds, and manage power distribution.
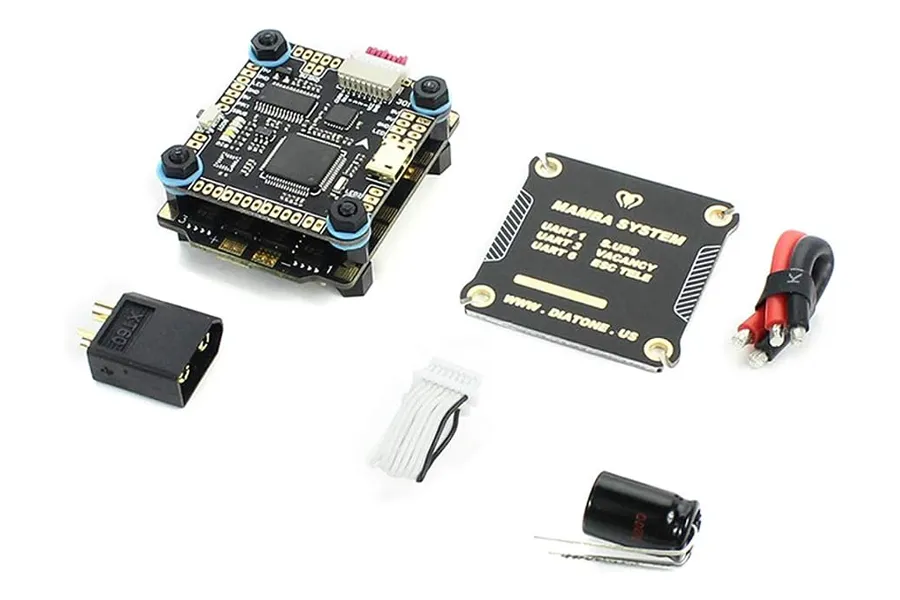
The Diatone Mamba FPV Stack
The Diatone Mamba FPV stack is known for its reliability and performance. It has gained popularity among drone enthusiasts for its ease of use and seamless integration into various frame designs. With robust features and an efficient layout, the Mamba stack has been a go-to choice for many FPV enthusiasts looking to build or upgrade their drones.
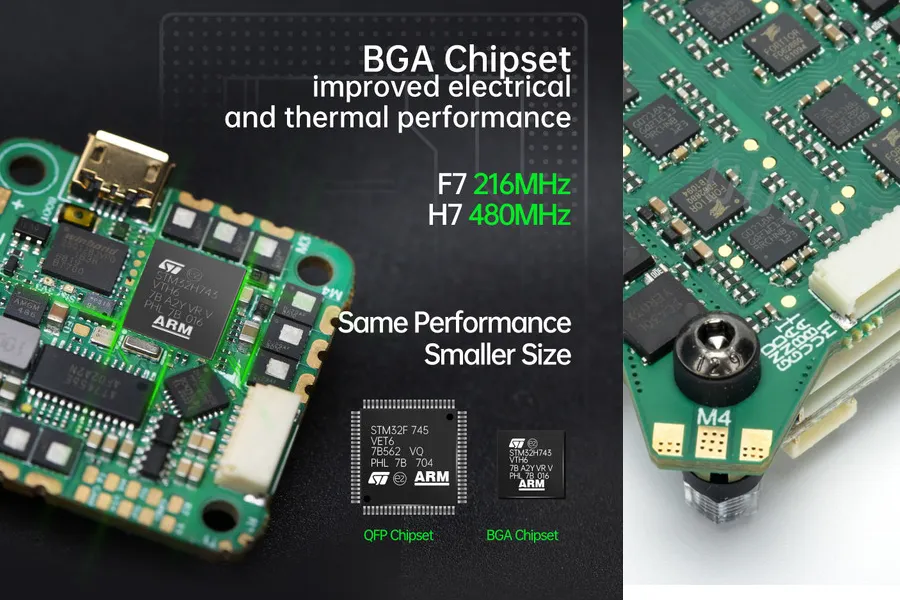
The Neutron RC FPV Stack
The Neutron RC FPV stack is a relatively newer entrant into the market. Engineered with advanced technology and cutting-edge design, the Neutron RC stack boasts enhanced performance, improved power management, and customizable features. Designed to deliver a top-notch FPV experience, it has gained traction among seasoned pilots who crave precision and flexibility in their flights.
The Benefits of Upgrading to the Neutron RC FPV Stack
- Improved Performance: The Neutron RC FPV stack offers higher processing power and improved firmware, leading to more responsive flight controls. This translates to smoother flights and better maneuverability, allowing pilots to execute complex aerial stunts with ease.
- Enhanced Power Management: The Neutron RC stack comes equipped with efficient voltage regulators, ensuring optimal power distribution and reducing the risk of voltage spikes or drops. This results in improved motor efficiency and reduced heat generation, prolonging the life of your motors and electronic components.
- Customization Options: Unlike some other FPV stacks, the Neutron RC stack offers extensive customization options through its user-friendly software interface. Pilots can tailor flight parameters, PID settings, and other variables to suit their flying style, making it a versatile choice for both beginners and experienced fliers.
- Video Transmission Quality: The Neutron RC stack’s integrated video transmitter provides better video transmission quality, reducing the chances of signal dropout or interference. This ensures a clearer and more immersive FPV experience for the pilot.
- Compact and Lightweight Design: The Neutron RC stack is designed to be compact and lightweight, making it ideal for racing drones and freestyle quadcopters. The reduced weight contributes to improved agility and overall flight performance.
Considerations Before Upgrading
- Compatibility: Before proceeding with the upgrade, ensure that the Neutron RC FPV stack is compatible with your existing drone frame and other components. Check the stack’s size and mounting holes to ensure a seamless fit.
- Wiring and Soldering: Upgrading an FPV stack requires careful attention to wiring and soldering. Double-check the pinout diagrams and instructions provided with the new stack to avoid potential issues during installation.
- Firmware and Configuration: Familiarize yourself with the Neutron RC stack’s firmware and configuration software. Be prepared to transfer your existing flight settings or configure the new stack to match your preferred flying style.
- Budget: While the benefits of upgrading are significant, consider your budget for the new FPV stack. Research the market for the best deals and discounts to make a cost-effective purchase.
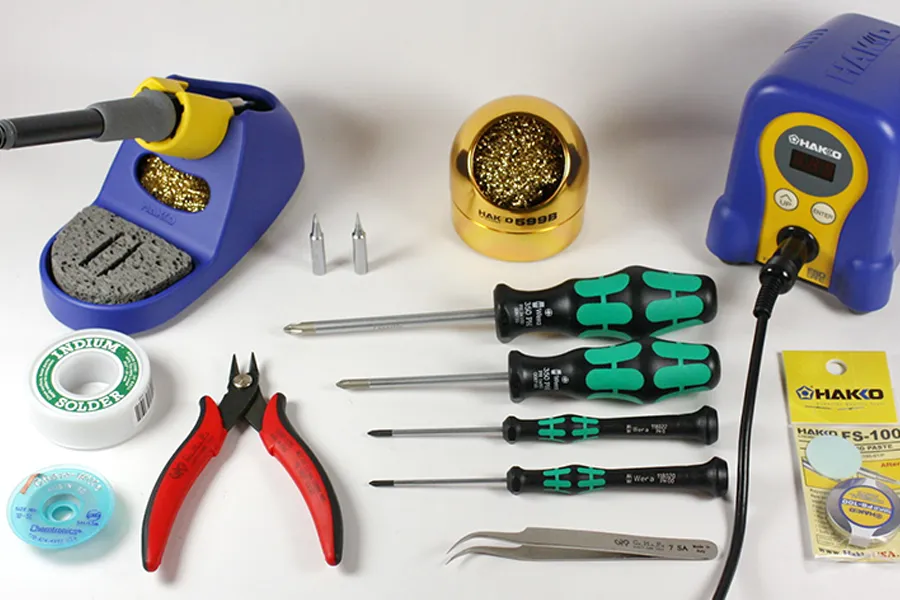
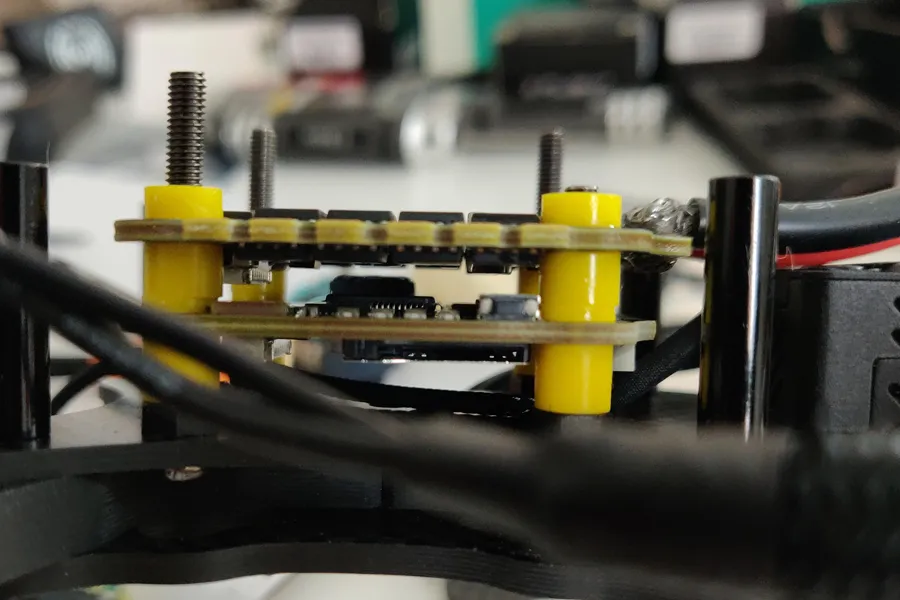
Desoldering a Mamba flight stack, or any electronic component, requires patience, precision, and the right tools
What tools need to prepare before installing fpv stack?
Tools and Materials:
- Soldering iron with adjustable temperature settings
- Desoldering pump (solder sucker) or desoldering wick
- Flux
- Isopropyl alcohol and cotton swabs (to clean the PCB after desoldering)
- Tweezers or pliers (to remove any components if needed)
Step 1: Prepare Your Workspace
Clear a clean and well-lit area to work on your drone. Gather all the necessary tools and materials, including the replacement flight stack (if applicable). Put on your safety goggles to protect your eyes during the desoldering process.
Step 2: Heat Up the Soldering Iron
Turn on your soldering iron and set it to the appropriate temperature for the solder used in your Mamba flight stack. Typically, a temperature between 350°C to 400°C (660°F to 750°F) works well for most solder types.
Step 3: Apply Flux
Applying a small amount of flux to the solder joints can improve the solder flow and make desoldering easier. However, be sure to clean off any excess flux after desoldering to avoid any potential issues later.
Step 4: Desoldering Using a Desoldering Pump
Hold the desoldering pump in one hand and the soldering iron in the other. Heat up the solder joint by touching the tip of the soldering iron to the joint. Once the solder becomes liquid, quickly position the desoldering pump’s nozzle over the joint and press the plunger to create a vacuum. The pump will suck up the molten solder, clearing the hole.
Step 5: Desoldering Using a Desoldering Wick
If you don’t have a desoldering pump, you can use desoldering wick (also known as solder wick). Place the wick over the solder joint and apply the heated soldering iron to the wick. The wick will absorb the melted solder.
Step 6: Remove the Flight Stack
Once you have desoldered all the connections between the flight stack and the drone’s frame, gently lift the flight stack using tweezers or pliers. Be careful not to damage any surrounding components or the printed circuit board (PCB).
Step 7: Clean the PCB
After removing the flight stack, inspect the PCB for any remaining solder or debris. Use isopropyl alcohol and cotton swabs to clean the pads thoroughly. Ensure there is no short circuit between the solder pads.
How to install to fpv stack the frame and connect with other fpv drone kits
Wiring up a 4-in-1 ESC (Electronic Speed Controller) is a crucial step in building a quadcopter or any multirotor drone. A 4-in-1 ESC combines four individual ESCs into a single package, simplifying the wiring process and saving space on the drone’s frame
Step 1: Mount the 4-in-1 ESC
First, mount the 4-in-1 ESC on your drone’s frame. Most frames have designated mounting holes for the ESC, but if yours doesn’t, use double-sided tape or adhesive to secure the ESC to a flat surface on the frame. Ensure the ESC is placed securely and away from any moving parts, like the propellers.

Step 2: Connect Motor Wires
The 4-in-1 ESC will have four sets of motor pads labeled M1, M2, M3, and M4. Connect the three motor wires from each motor to the corresponding pads on the ESC. coding for motor wires is as follows:
- Motor 1 (M1):
- Motor 2 (M2):
- Motor 3 (M3):
- Motor 4 (M4):
Ensure that the motor wires are securely soldered and insulated to prevent any short circuits.


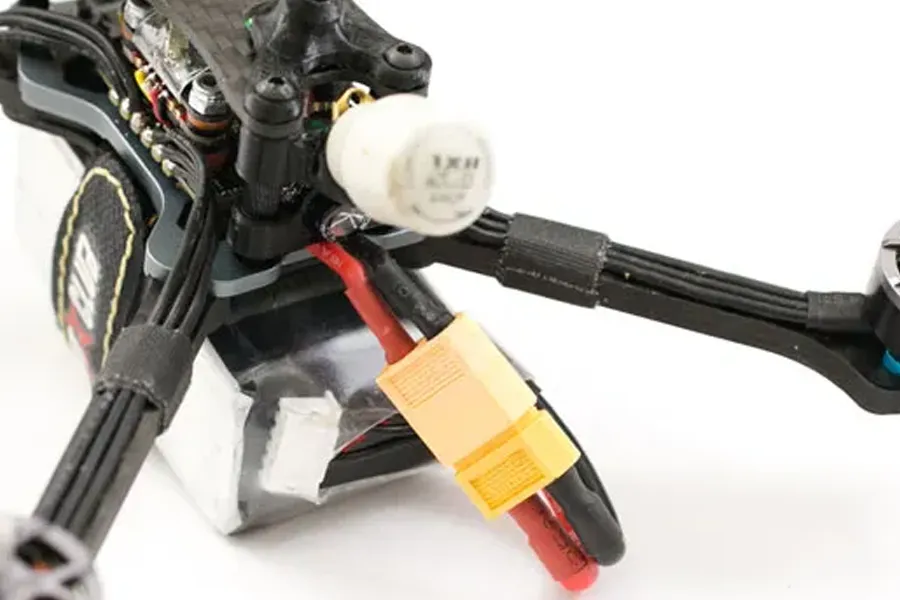
Step 3: Connect Battery Wires:
Next, locate the battery pads on the 4-in-1 ESC, usually labeled BAT or B+. Solder the positive (+) and negative (-) wires from your drone’s battery connector to these pads. Ensure a solid and secure connection, and consider using heat shrink tubing to insulate the soldered connections.
Adding the flight controller
Step 1: Mount the Flight Controller
Securely mount the Neutron RC flight controller on your drone’s frame using mounting screws or standoffs. Ensure the orientation of the flight controller is correct (usually with the USB port facing forward) to match the direction of the drone’s movements.
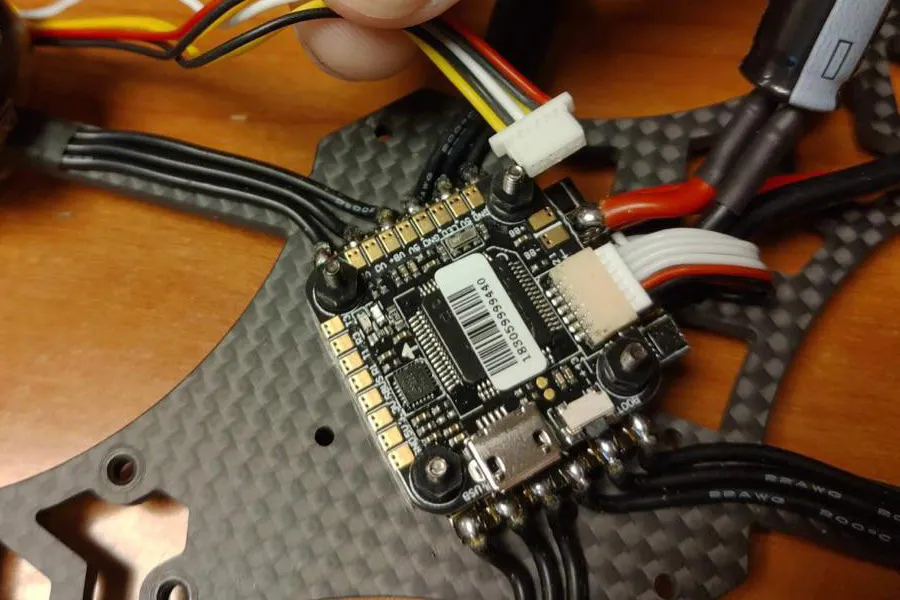

Step 2: Connect the 4-in-1 ESC (if applicable)
If you’re using a 4-in-1 ESC, follow the instructions provided with the ESC to connect the motor wires to the designated pads on the flight controller. Typically, the motor outputs on the flight controller will be labeled M1, M2, M3, and M4, and you’ll connect the motor wires in the same order.
Step 3: Connect the Receiver
If your Neutron RC flight controller does not have an integrated receiver, connect your external receiver to the flight controller using the appropriate connections (usually SBUS, iBUS, or PPM). Refer to the flight controller’s manual for specific details on receiver connections.
Step 4: Connection to Other Components
If you have additional components like an FPV camera, video transmitter (VTX), and OSD (On-Screen Display), connect them to the appropriate pads on the flight controller following the instructions provided with these components. The camera normally goes to a 5v pad cam/vidin and ground, vtx has vtx/vid in pad, 5vpad, graond,
Step 5: Configure the Flight Controller
Once everything is wired up, connect your drone to a computer using a USB cable and open the Betaflight configurator software (or any other relevant software if the flight controller requires different firmware). Configure the flight controller, calibrate the ESCs, and set up any necessary settings, such as motor direction, receiver inputs, and PID tuning.
Step 6: Test and Calibrate: After configuring the flight controller, perform some basic tests to ensure all motors spin correctly and respond to the transmitter inputs. Make sure the drone is stable and reacts as expected to control inputs.
Factors to consider when choosing flight controller stack
Thanks to technological developments, a range of choices are now accessible, ranging from sophisticated FCs with integrated GPS for long-distance flying to high-performance ESCs for racing. Choosing the appropriate ESC and FC is essential for a successful and pleasurable FPV drone experience, regardless of pilot experience level.
Drone size and type
Different size drones require different power and features.When choosing a flight controller, it is essential to carefully consider the features and capabilities of the available models and select the one that best suits the needs of your drone.
Flight style
Racing drones need faster and more responsive stacks than freestyle or long-range drones. Therefore, the flight style is one factor to consider when choosing best flight controller stack.
Budget
Stacks range in price from budget-friendly options to high-end models with advanced features.
When choosing a stack, consider the features, performance, compatibility, and price to find the best fit for your needs.
Recommendation of fpv stack from different size
16×16 flight controller stack
The Talon 16×16 offers full-sized performance. Talon quality is characteristic, and they deliver state-of-the-art performance at affordable prices so that everyone may use them. Utilize the newest and greatest technologies available to elevate your micros to a whole new level. Put an end to compromising with subpar performance from your micros! Everything and more that a Talon product should offer!
20×20 Flight Controller Stack
Here we recommend MEPS SZ F7 Mini Flight Controller and MEPS Mini SZ45A for 20×20 Flight Controller Stack.
The DJI Air Unit cable, two different ESC cable types, and two sets of silicone grommets (with heights of 4 and 7 mm) are included in the cardboard box that houses the MEPS SZ Flight Controller 20×20. Two 8-pin connectors on one of the ESC cables are meant for MEPS ESCs, while the second cable just has one connector and offers the option of an 8- or 10-pin plug for customisation.
The f7 20×20 flight controller board is 37x37x8 mm in size and is based on an STM32F22 CPU. This best Micro Flight Controller fits 2.5–5 FPV drones and features mounting patterns of 20×20 mm. On top of the flight controller are the USB Type-C port, ESC connector, Digital VTX port, boot button, and all of the soldering pads. Along with dedicated buzzer and LED pads, Mini F7 Flight Controller has five UART interfaces. Next to the Type-C connector are six pins (GND, 5V, RX3, TX3, SDA, and SCL) that are used for GPS modules. For powering the VTX and other external modules, it contains 10V and 5V pads. A set of three pads referred to as the “VTX switch” on the up/left corner makes it easy to regulate the analog FPV transmitter and keeps it from overheating when bench operating.
The mounting pattern of MEPS Mini SZ45A, which measures 20 by 20 mm, is the best quad esc and fits 3.5 to 5 inch fixed-point drones. The board itself weighs close to 10 grams and has dimensions of roughly 33.5 by 39.8 mm. The pinout of its 6-pin connector is as follows: BAT+, GND, ESC4, ESC3, ESC2, ESC1, Telemetry, and Current. There are solder holes on the huge battery pads for the low ESR capacitor. As I indicated before, you can keep the motor-ESC cables in place for as long as you choose. Regarding the battery cable, I advise against it. In order to prevent voltage spikes from harming electrical components, the LIPO wire length needs to be maintained short. I recommend swapping out the stock capacitor for a 1000uF one if you operate on 6s.
30×30 flight controller stack
Here we recommend MEPS SPACE f7 flight controller stack, including F7 HD Flight Controller and MEPS 60A for 30×30 Flight Controller Stack.
The MEPS SPACE F7 HD Flight Controller is the best flight controller for fpv drone, a full-sized, 30×30 digital flight controller that has been painstakingly designed for optimal performance in the field of first-person virtual reality. With its STM32F722 microcontroller and smooth Betaflight firmware compatibility, it is among the top FPV flight controllers for digital constructions.
With an interface connector made especially for digital video systems, this FPV flight controller combines precision and ease in its design. The thoughtful design and generously sized solder pads simplify assembly and guarantee a smooth building process. There is no need for soldering when attaching your HD Digital VTX thanks to the extra convenience of a 6-pin plug&play interface.
Discover unmatched performance with the industry-best 4 in 1 ESC, the MEPS 60A FPV Drone ESC 4 in 1. This drone ESC supports higher protocols and has the fastest MCU, completely supported by BLHELI32. It responds faster, providing an unparalleled flying experience. It is unique among 6s ESCs in that it offers the best power for drones with excellent performance.
The MEPS 60A is best cheap brushless esc, built to last thanks to an improved heat sink and an industrial-grade PCB that greatly increase heat dissipation capability. It guarantees a dependable and effective flying experience with complete access to all relevant flight data. For discerning FPV enthusiasts, this drone ESC 4 in 1 is the best option since it works with the majority of popular FPV frames.
If you want to watch video about the fpv stack, please click here:
Conclusion:
Wiring up a Neutron RC flight controller, or any flight controller, is a fundamental step in building a drone. Always refer to the specific flight controller’s manual and follow any provid ed instructions to ensure a successful and safe build. If you encounter any issues during the process, seek help from experienced drone builders or online communities to troubleshoot and resolve the problem.
Author:Giannis Mathios
FB:https://www.facebook.com/noukos